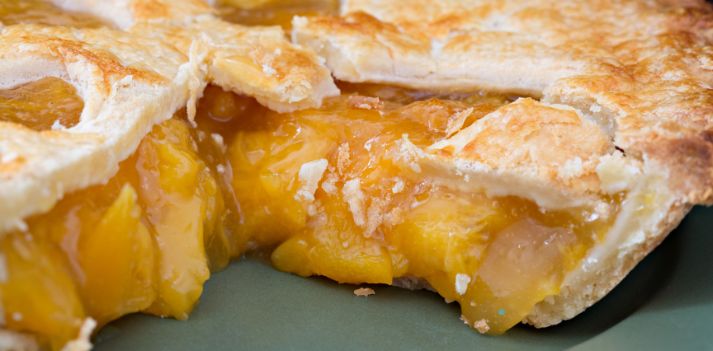
The Perfect Peach Pie Recipe
Picture this: the sun is setting on a balmy summer evening, and the sweet, intoxicating aroma of fresh peaches wafts through your kitchen. There’s something almost magical about transforming these juicy fruits into a golden, bubbling pie that seems to whisper sweet nothings to your taste buds.
A homemade peach pie isn’t just dessert; it’s a celebration of summer’s bounty wrapped in a flaky, buttery crust.
Whether you’re a seasoned baker or a kitchen newbie, this peach pie recipe will guide you through creating a slice of heaven that’ll have everyone begging for seconds.
The beauty of peach pie lies in its simplicity – the natural sweetness of ripe peaches needs little embellishment. With just a handful of ingredients and a bit of patience, you’ll create a dessert that captures sunshine in every bite.
So roll up those sleeves, dust your countertop with flour, and let’s dive into pie-making paradise!
INGREDIENTS
For the crust:
- 2½ cups all-purpose flour
- 1 teaspoon salt
- 1 tablespoon granulated sugar
- 1 cup cold unsalted butter, cubed
- ¼ to ½ cup ice-cold water
- 1 tablespoon apple cider vinegar (optional, makes the crust extra flaky!)
For the filling:
- 8-10 ripe peaches (about 3 pounds)
- ¾ cup granulated sugar
- ¼ cup brown sugar
- ¼ cup cornstarch
- 1 teaspoon ground cinnamon
- ¼ teaspoon ground nutmeg
- ¼ teaspoon salt
- 2 tablespoons fresh lemon juice
- 1 teaspoon vanilla extract
- 2 tablespoons butter, cut into small pieces
For the finish:
- 1 egg, beaten with 1 tablespoon water (for egg wash)
- 2 tablespoons coarse sugar for sprinkling
INSTRUCTIONS
Start by preparing your pie crust. In a large bowl, whisk together the flour, salt, and sugar. Add the cold cubed butter and use a pastry cutter or your fingertips to work it into the flour until the mixture resembles coarse crumbs with some pea-sized pieces remaining.
Mix the apple cider vinegar with ¼ cup of ice water, then drizzle it over the flour mixture. Stir with a fork until the dough begins to come together, adding more water a tablespoon at a time if needed.
Divide the dough into two equal portions, shape into disks, wrap in plastic, and refrigerate for at least 1 hour.
While the dough chills, prepare your peaches. Bring a large pot of water to a boil. Cut a small “X” on the bottom of each peach, then carefully drop them into the boiling water for 30-60 seconds.
Transfer them immediately to an ice bath. Once cool, the skins should slip off easily. Slice the peeled peaches into ½-inch thick slices, discarding the pits. In a large bowl, gently toss the peach slices with both sugars, cornstarch, spices, salt, lemon juice, and vanilla extract.
Let this mixture sit for about 30 minutes, allowing the peaches to release their juices.
Preheat your oven to 425°F (220°C) and place a baking sheet on the lower rack to catch any potential overflow. Roll out one disk of dough on a floured surface into a 12-inch circle, then carefully transfer it to a 9-inch pie dish.
Pour the peach filling into the crust, including all the accumulated juices, and dot with the small pieces of butter. Roll out the second disk of dough and either place it whole over the filling (cutting slits for steam) or create a lattice pattern for that classic pie look.
Trim any excess dough hanging over the edges, then fold and crimp the edges decoratively. Brush the top crust with egg wash and sprinkle with coarse sugar.
Cover the edges with foil or a pie shield to prevent over-browning. Bake at 425°F for 20 minutes, then reduce the temperature to 375°F (190°C) and continue baking for 30-35 minutes more, until the crust is golden and the filling is bubbling.
Cool on a wire rack for at least 3 hours before slicing to allow the filling to set properly. This patience-testing waiting period is perhaps the hardest part of the recipe, but I promise it’s worth it!

FAQs
1. Can I use canned or frozen peaches instead of fresh ones?
Absolutely! If fresh peaches aren’t in season, you can substitute with frozen (thawed and drained) or canned peaches (drained well).
You might want to reduce the sugar slightly as these options tend to be sweeter than fresh peaches.
2. How do I know if my peaches are ripe enough for pie?
The perfect pie peach should yield slightly to gentle pressure and have a sweet fragrance. If your peaches are too firm, place them in a paper bag at room temperature for 1-2 days to speed up ripening.
3. My pie filling turned out runny. What went wrong?
Several factors can cause a runny filling: under-ripe peaches have less pectin, too little cornstarch, or not allowing the pie to cool completely.
Make sure to let your pie cool for at least 3 hours before cutting to allow the filling to set properly.
4. Can I make this pie ahead of time?
Yes! You can prepare the dough up to 3 days in advance (stored in the refrigerator) or freeze it for up to 3 months.
The assembled, unbaked pie can be frozen for up to 3 months as well – just add about 15-20 minutes to the baking time if baking from frozen.
5. What’s the best way to store leftover peach pie?
If you’re lucky enough to have leftovers, you can store your pie covered at room temperature for up to 2 days or in the refrigerator for up to 5 days.
Reheat individual slices in a 350°F oven for about 10 minutes to recrisp the crust.
CONCLUSION
There you have it – a homemade peach pie that captures summer’s essence in every heavenly bite. What makes this recipe special isn’t just the perfect balance of sweet, juicy peaches and buttery, flaky crust, but the love and care that goes into creating it.
Like all the best things in life, a great pie takes a little time and patience, but the rewards are immeasurably sweet.
So the next time you find yourself with a basket of perfect peaches, remember this recipe.
Whether you’re sharing it at a backyard barbecue, bringing it to a family gathering, or simply enjoying a slice with your afternoon coffee, this peach pie is more than just dessert – it’s a little piece of culinary magic that connects us to summer’s simple pleasures.
Happy baking, friends!

