Welcome to our guide on making the perfect molasses cookies. In this article, we’ll walk you through everything you need to know to create these irresistibly soft, spiced treats that will fill your home with the most amazing aroma.
Whether you’re a beginner or experienced baker, these instructions will help you create cookies that are crisp at the edges and perfectly chewy in the middle with ease.
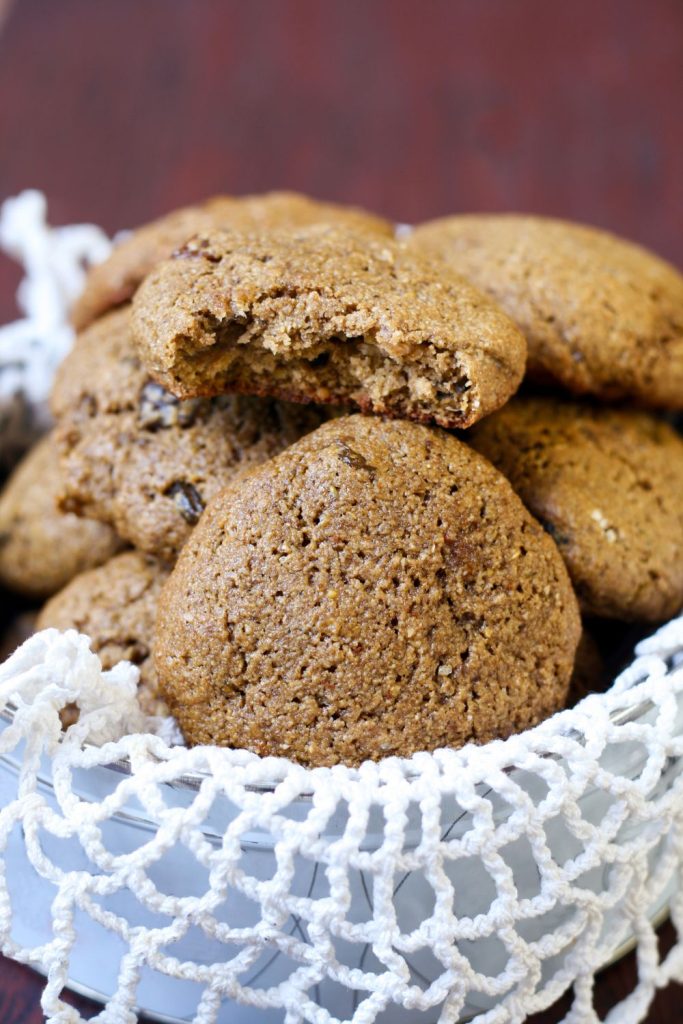
Molasses cookies have a rich history dating back generations, beloved for their deep, complex flavor profile that combines the earthy sweetness of molasses with warming spices.
There’s something almost magical about the way these cookies crackle on top while staying tender inside. They’re the kind of treat that makes everyone ask for your recipe!
What makes our version special is the perfect balance of spices and the technique that ensures that signature texture. Unlike their cousin the gingerbread cookie, molasses cookies are softer and more tender, making them the perfect companion for a glass of cold milk or hot coffee.
The best part? They actually taste even better the day after baking, as the flavors have time to meld and develop.
INGREDIENTS
- 3/4 cup unsalted butter, softened to room temperature
- 1 cup packed dark brown sugar
- 1/4 cup unsulphured molasses (not blackstrap)
- 1 large egg, at room temperature
- 2 teaspoons pure vanilla extract
- 2 1/4 cups all-purpose flour
- 1 1/2 teaspoons baking soda
- 1 teaspoon ground cinnamon
- 1 teaspoon ground ginger
- 1/2 teaspoon ground cloves
- 1/4 teaspoon ground nutmeg
- 1/2 teaspoon salt
- 1/3 cup granulated sugar (for rolling)
The quality of your molasses makes a huge difference in these cookies. Look for unsulphured molasses, which has a milder, cleaner flavor than blackstrap varieties.
Blackstrap molasses is much more bitter and intense, which can overwhelm the delicate balance of flavors we’re trying to achieve. The dark brown sugar adds additional molasses flavor and helps create that perfect chewy texture.
Fresh spices will elevate your cookies from good to extraordinary. If your spices have been sitting in your pantry for more than a year, consider replacing them before making these cookies.
The difference in aroma and flavor is remarkable!
The combination of cinnamon, ginger, cloves, and nutmeg creates that classic “warm spice” profile that pairs so beautifully with the deep sweetness of molasses.
INSTRUCTIONS
Start by creaming together the softened butter and brown sugar until light and fluffy, about 3-4 minutes. This step is crucial for incorporating air into the dough, so don’t rush it! Add the molasses, egg, and vanilla extract, beating until well combined.
The mixture might look a bit curdled at this stage, but don’t worry—that’s completely normal.
In a separate bowl, whisk together the flour, baking soda, cinnamon, ginger, cloves, nutmeg, and salt until evenly distributed.
Gradually add this dry mixture to your wet ingredients, mixing on low speed just until combined. Be careful not to overmix, which can result in tough cookies. The dough will be soft and slightly sticky.
Cover the bowl with plastic wrap and refrigerate for at least 2 hours or overnight. This chilling step is non-negotiable! It allows the flavors to meld and the flour to hydrate properly, resulting in a better texture and preventing excessive spreading during baking.
When you’re ready to bake, preheat your oven to 350°F (175°C) and line baking sheets with parchment paper.
Scoop the chilled dough into balls about 1 1/2 tablespoons in size, then roll each ball in the granulated sugar until completely coated. Place on the prepared baking sheets about 2 inches apart.
Bake for 10-12 minutes, until the edges are set but the centers still look slightly underdone and the tops have that characteristic crackly appearance. Let the cookies cool on the baking sheet for 5 minutes before transferring to a wire rack to cool completely.
They’ll firm up as they cool while maintaining that perfect chewy center.
FAQs
How long does this process take?
From start to finish, you’ll need about 3 hours to make these molasses cookies, but only about 30 minutes of that is active preparation time.
The dough needs to chill for at least 2 hours (or overnight if you prefer), which is essential for developing flavor and ensuring the cookies bake properly. The actual mixing takes about 15 minutes, and each batch bakes for 10-12 minutes.
You can absolutely make the dough ahead of time—it keeps well in the refrigerator for up to 3 days, or you can freeze the dough balls for up to 3 months.
The chilling time might seem like an inconvenience, but it truly makes all the difference in these cookies.
Not only does it prevent them from spreading too much in the oven, but it also allows the molasses and spices to fully infuse the dough.
If you’re in a hurry, you can put the dough in the freezer for about 45 minutes instead of the refrigerator for 2 hours, though the flavor won’t be quite as developed.
Remember that baking times can vary based on your oven, so keep an eye on your first batch. The cookies should look slightly underdone in the center when you take them out—they’ll continue cooking from residual heat on the baking sheet.
If you wait until they look completely done in the oven, they’ll end up crisp rather than chewy once cooled.
Can I substitute any ingredients?
Absolutely! While the recipe as written creates a classic molasses cookie, there’s room for customization. If you don’t have dark brown sugar, light brown sugar will work, though the molasses flavor won’t be quite as pronounced.
For a gluten-free version, substitute a 1:1 gluten-free flour blend, but add 1/4 teaspoon of xanthan gum if it’s not already included in the blend.
Regarding the spices, feel free to adjust to your preference. Some people love to increase the ginger for a more gingerbread-like flavor, while others might prefer to omit the cloves or nutmeg if those aren’t favorite flavors.
You can also add 1/2 teaspoon of cardamom for an interesting twist. For a richer flavor profile, try using butter that you’ve browned and then chilled until solid again.
The one ingredient that’s hardest to substitute is the molasses itself, as it provides both the distinctive flavor and the moisture that creates the chewy texture.
In a pinch, you could use dark corn syrup or honey, but the cookies will taste significantly different—still delicious, just not classic molasses cookies. If you do make this substitution, reduce the amount to 3 tablespoons as these sweeteners are thinner than molasses.
What if I don’t have a stand mixer?
Don’t worry if you don’t have a stand mixer—these cookies can easily be made with a hand mixer or even by hand with a wooden spoon and some elbow grease!
When mixing by hand, make sure your butter is very soft (but not melted) to make the creaming process easier.
You’ll need to beat the butter and sugar vigorously for about 5 minutes to achieve the same lightness that a mixer would give you in 3-4 minutes.
If using a hand mixer, follow the same instructions as for a stand mixer, but be prepared to mix a bit longer at each stage.
When incorporating the dry ingredients with a hand mixer, use the lowest speed and mix just until combined to avoid sending flour flying everywhere. You might want to switch to a wooden spoon for the final mixing to prevent overworking the dough.
For those truly going old-school without any electric mixers, the key is patience and persistence. Cream the butter and sugar until your mixture lightens in both color and texture.
The dough will be stiff when adding the dry ingredients, but resist the urge to add any liquid. Working with well-chilled dough will be easier for hand-shaping the cookies as well.
How do I store the finished cookies?
These molasses cookies actually improve with age (up to a point)! Store them in an airtight container at room temperature, and you’ll find that the flavors continue to develop and meld for 2-3 days.
To keep them optimally chewy, add a slice of bread to the container—the cookies will absorb moisture from the bread, keeping them soft and tender. Replace the bread slice when it becomes dry.
For longer storage, these cookies freeze beautifully for up to 3 months. Place them in a single layer on a baking sheet to freeze solid, then transfer to a freezer-safe container or bag with parchment paper between layers to prevent sticking.
Thaw at room temperature for about an hour before serving. You can also microwave a frozen cookie for about 10-15 seconds for that fresh-baked taste and texture.
If you prefer a crisper cookie, store them in a container with a loose-fitting lid or even a cookie jar. The exposure to air will help them crisp up a bit more.
Conversely, if your cookies have hardened too much, place a damp paper towel in the container overnight (not touching the cookies), and they’ll soften right up. Just be sure to remove the paper towel once they’ve reached your desired texture to prevent mold.
CONCLUSION
Congratulations on mastering these delicious molasses cookies! We hope you enjoyed the process and are satisfied with your results. Remember that practice makes perfect, so don’t be discouraged if your first attempt isn’t flawless.
The beauty of homemade cookies is in their uniqueness—those slightly irregular shapes and sizes are what make them special and unmistakably homemade.
As your baking confidence grows, feel free to experiment with this recipe. Add some crystallized ginger for extra zing, or fold in some chocolate chips for a modern twist. Whatever variations you try, we’d love to hear about your experiences and see your creations.
Happy baking, and may your kitchen always be filled with the irresistible aroma of freshly baked molasses cookies!
Now that you’ve got this fantastic molasses cookie recipe in your arsenal, you’re ready to impress friends and family with these irresistible treats. The combination of rich molasses, warm spices, and that perfect chewy texture makes these cookies stand out from the crowd.
They’re rustic yet sophisticated, simple yet complex in flavor—truly the perfect cookie for any occasion, from holiday cookie exchanges to casual weekend baking projects.

